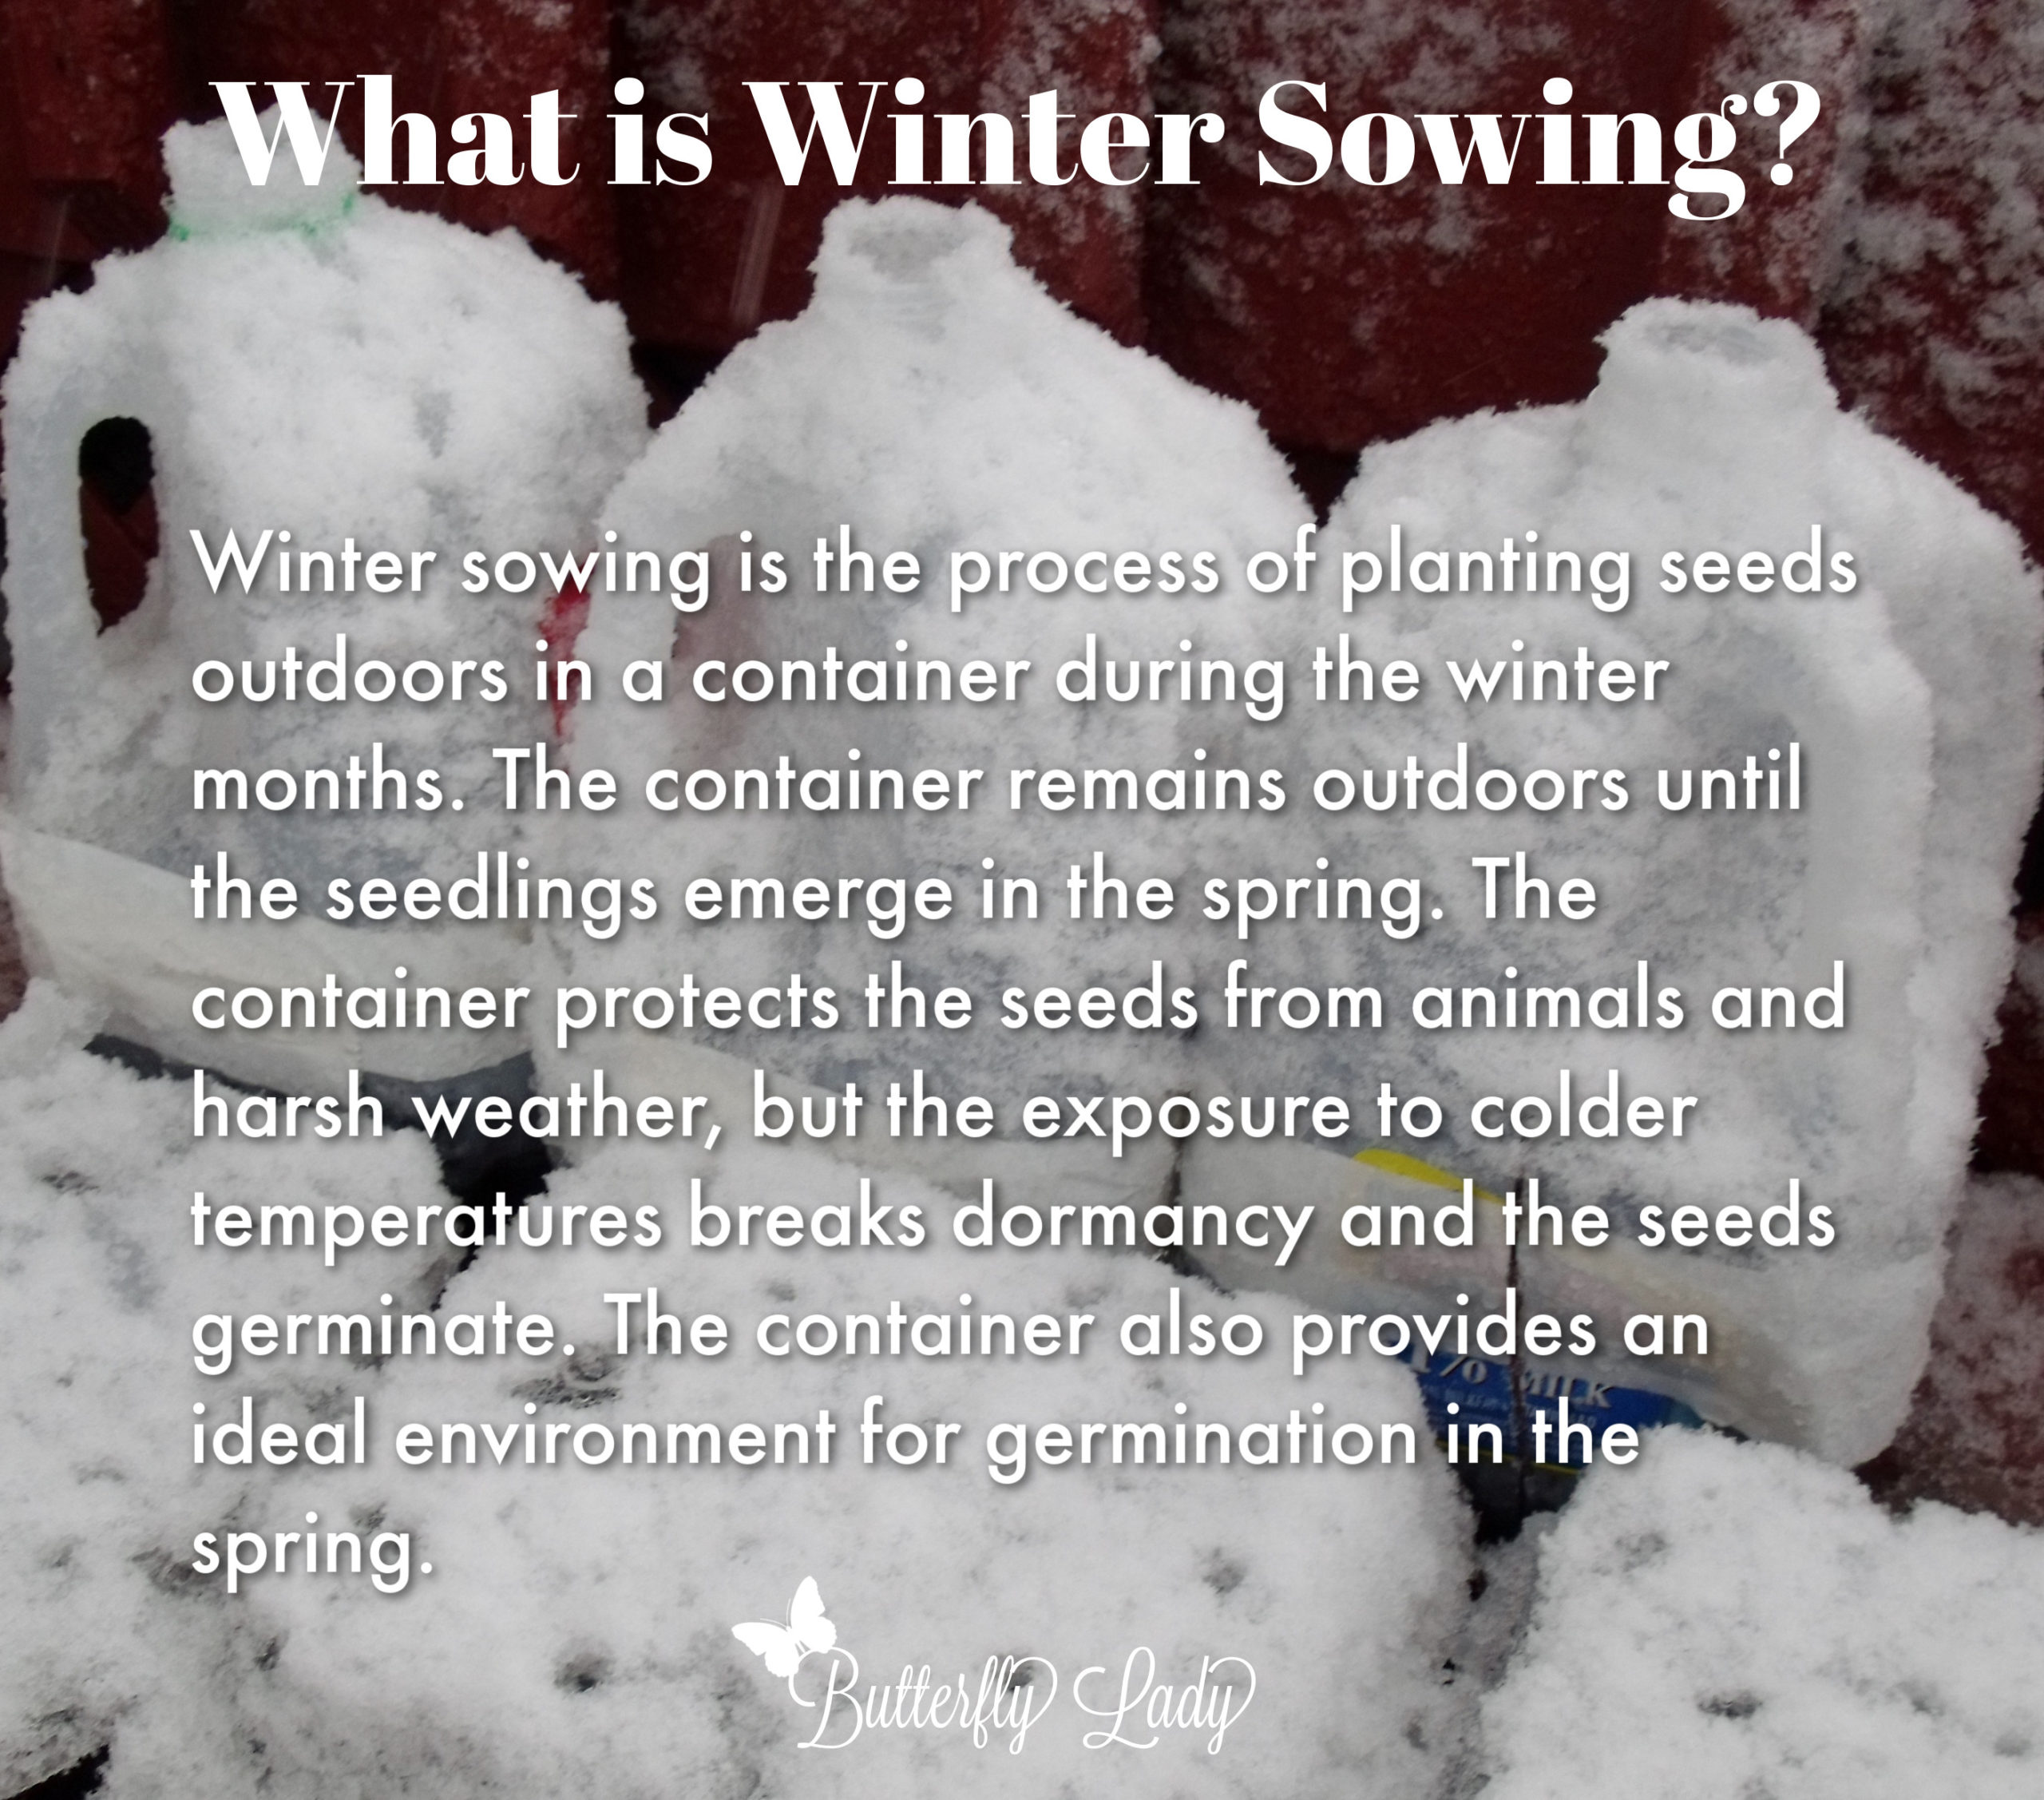
 Winter sowing is a method of starting seeds outdoors in winter. This is generally done with seeds that require a period of cold stratification. The method takes advantage of natural temperatures, rather than artificially refrigerating seeds.
When Do You Winter Sow
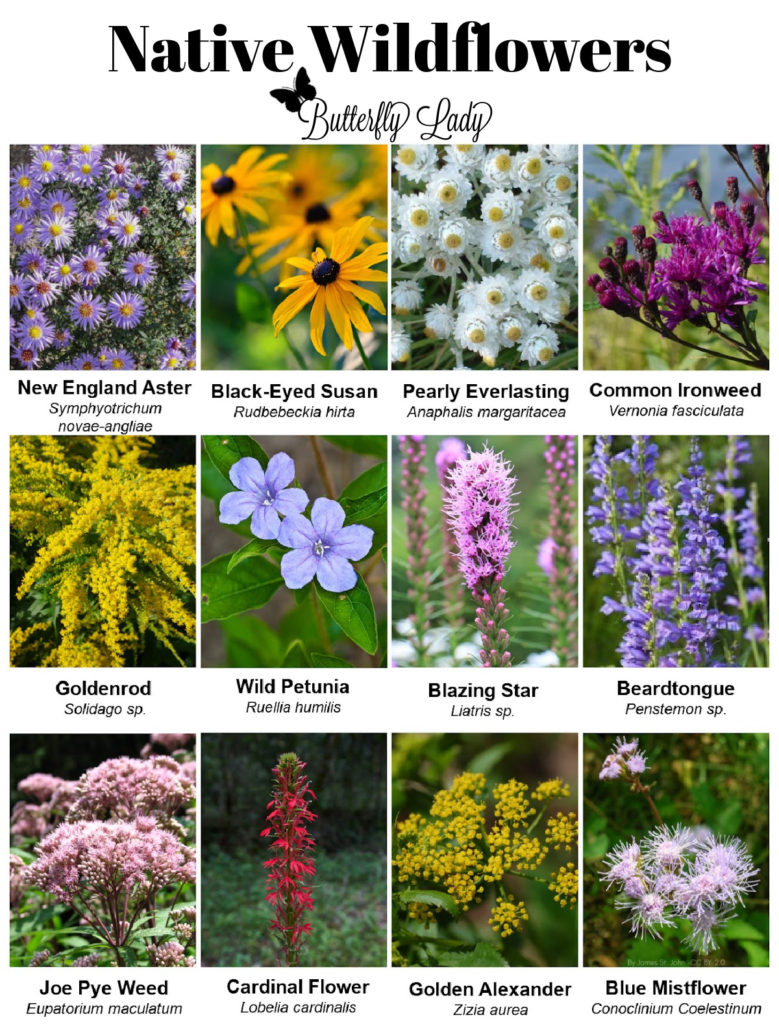
Winter sowing starts on or after the Winter Solstice. January and February are best times to winter sow native milkweed seeds and native perennial seeds.
What Can You Winter Sow
Any seeds that typically need to go through a cold stratification such as native milkweed seeds and native perennial seeds. As a rule of thumb, if a plant is hardy in your garden you can plant its seed in winter.

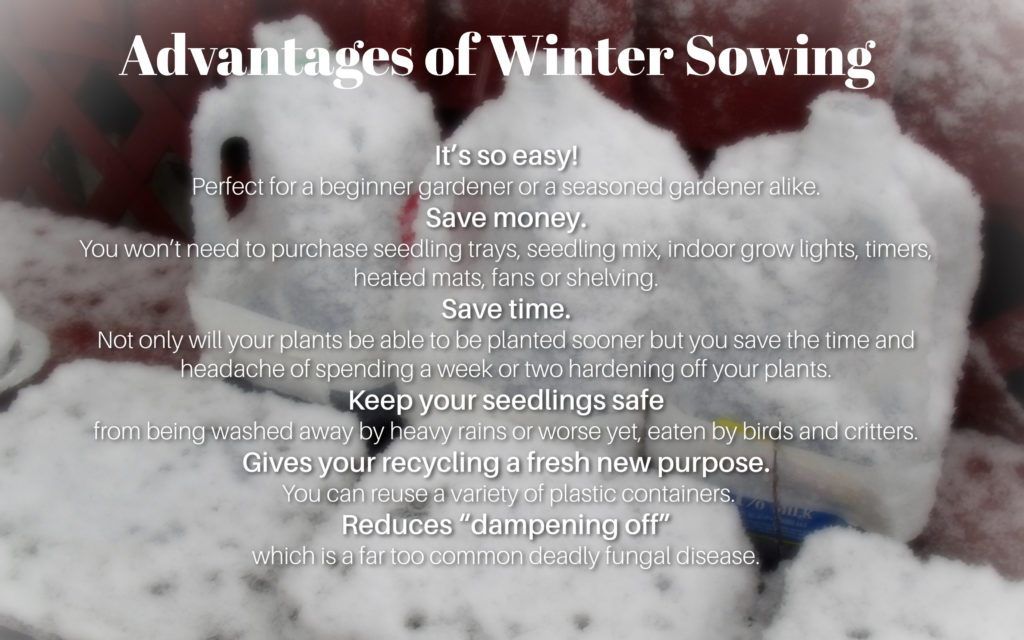
Advantages of Winter Sowing
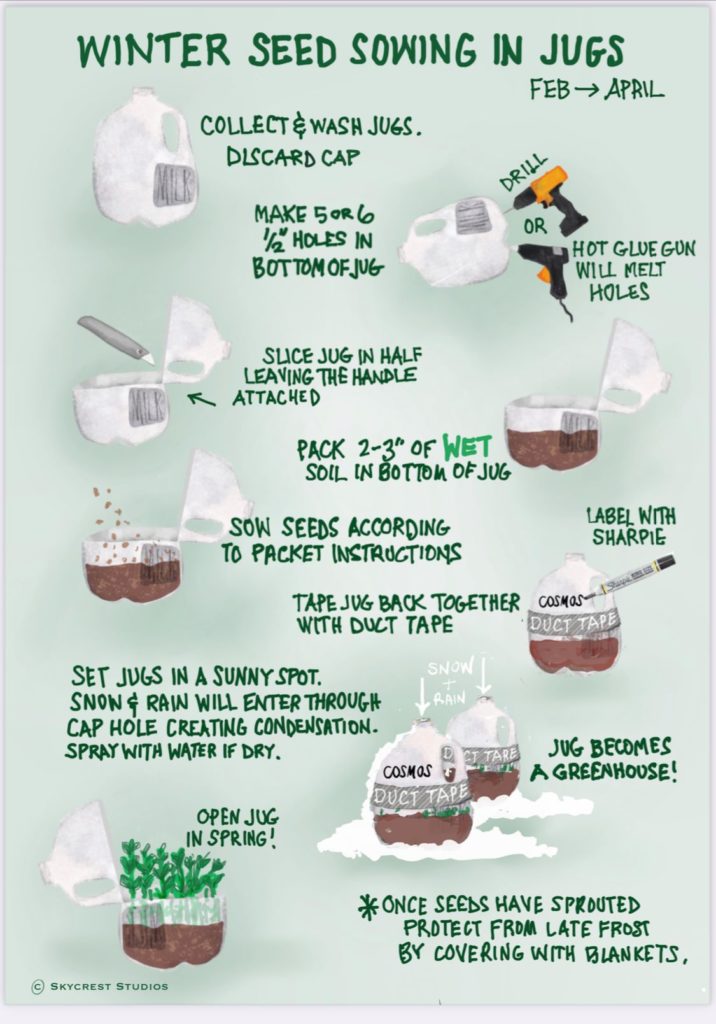
How to Winter Sow
- Choose the container. Anything that is translucent enough to allow light to pass through and that can be made to have drainage holes, a lid, and a ventilation holes can be used for winter sowing. Options include, but are not limited to, plastic jugs, water or soda bottles, take out containers, disposable foil pans with plastic covers, clamshell containers, disposable beverage cups, plastic tubs, and plastic totes. You can use any container for winter sowing as long as it can hold AT least 3”-4” of potting soil.
- Fill the bottom portion of your container with 3-4″ of potting soil that has been moistened.
- Broadcast the seeds over the soil.
- Slightly cover the seeds with garden coir or soil.
- Water your newly sowed seeds. I recommend using a spray bottle.
- Cover the container. Make sure the cover has holes for ventilation. If using a milk jug or plastic bottle remove the cap. Secure the cover to the container with Duct tape or Poly tape
- Label the containers. Use a waterproof marker such as a plant marker and label of the type of seed you planted. You can also a place plant marker inside the container.
- Set the containers outside on a flat surface, such as a patio or deck so they are exposed to the elements. Don’t leave them under an overhang. The point is to let them get exposed to the rain, snow, and sun.
- Sit back and relax!
- Once the weather is warmer and your seeds have germinated you can remove the duct tape and the top portion of the container. Leave them open until you’re ready to transplant into your garden.
- Water as needed to keep the soil moist.
- Transplant the seedlings when seedlings have become established and have developed true leaves.
More Resources: